Also known as: Parkour Roll, Safety Roll
Movement Pieces
- Side Shot (R)
- Side Shot (L)
- Front Shot (R)
- Front Shot (L)
- Rear Shot
- Shoulder Shot
- Entry Shot
- End Shot
- Notes for Shoulder Roll


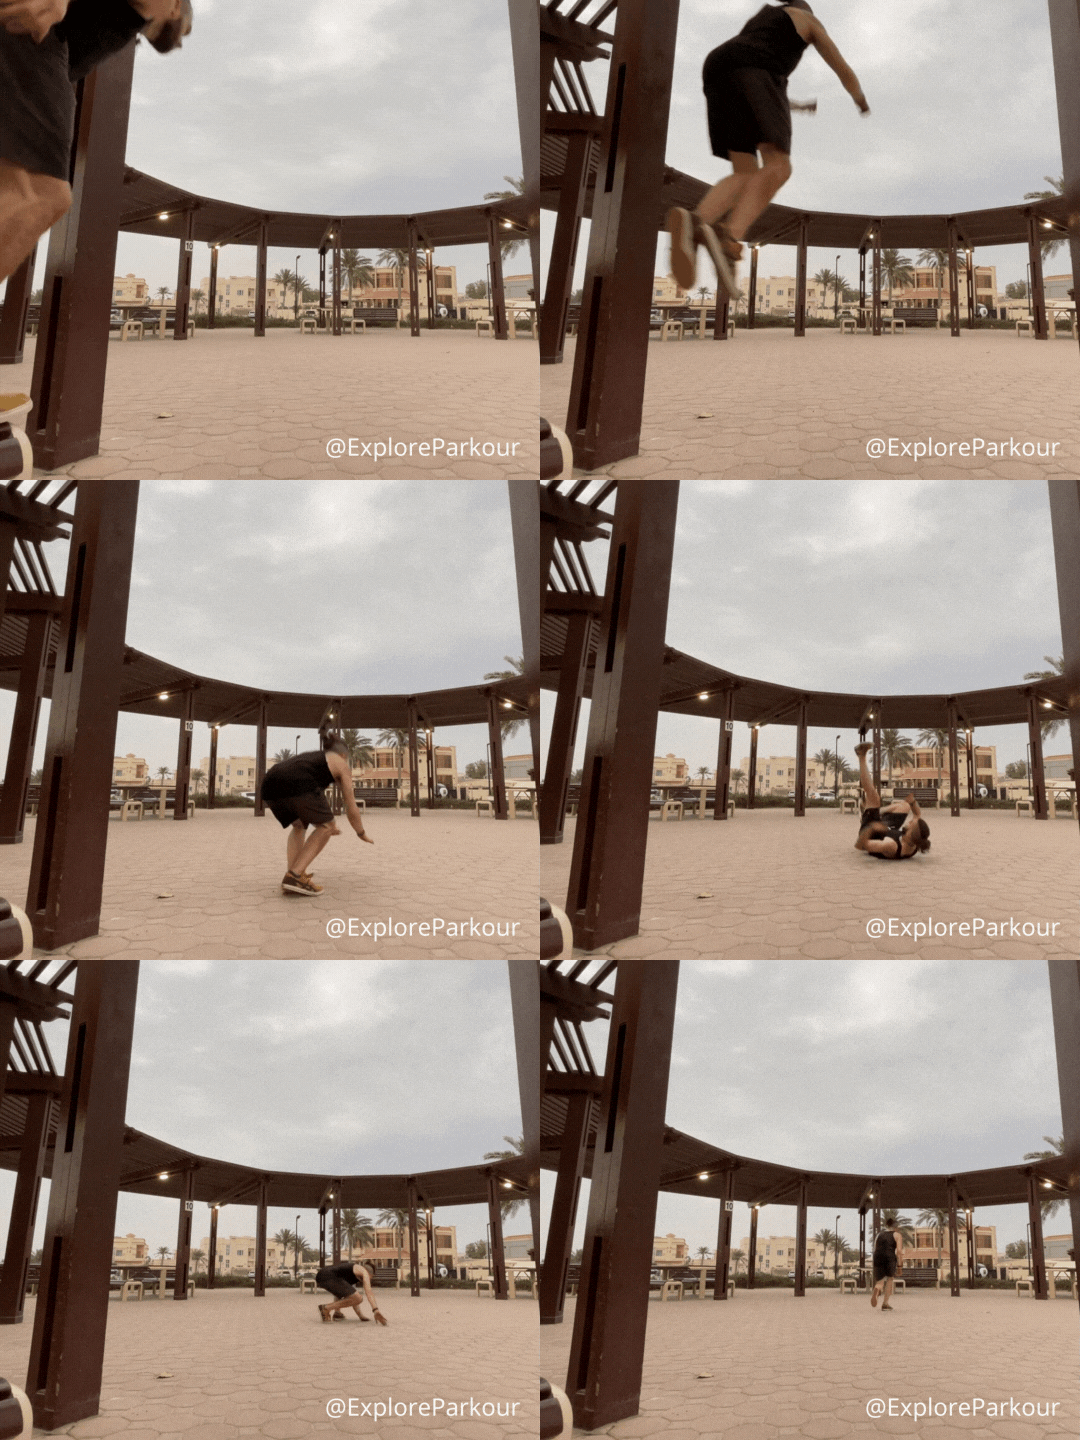
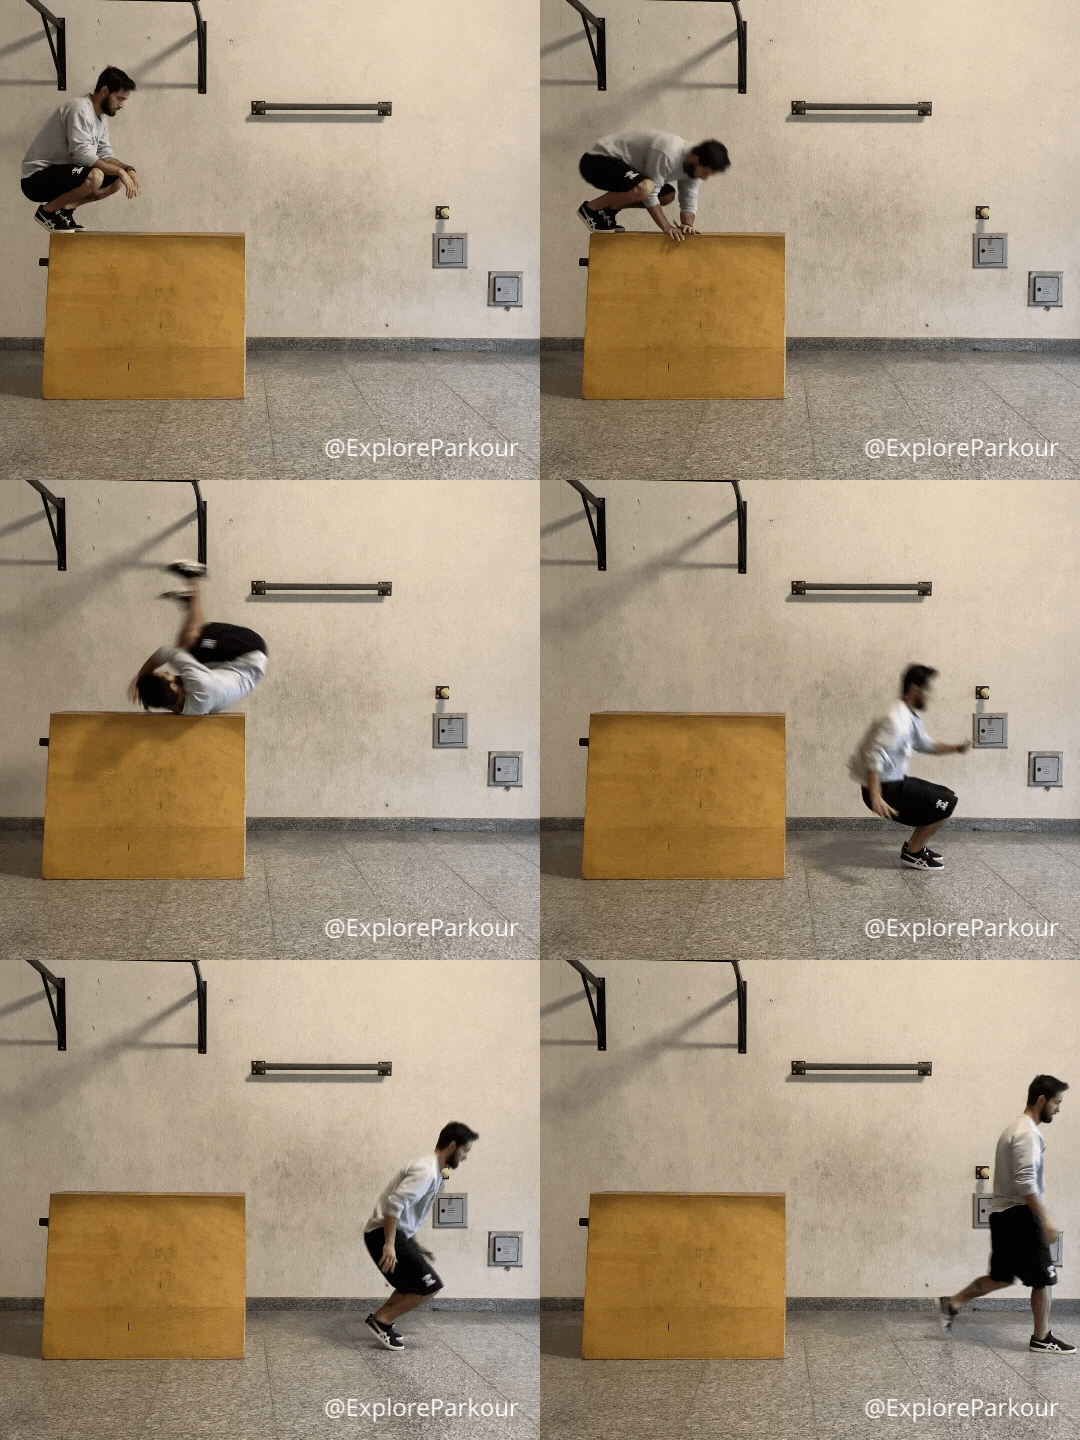
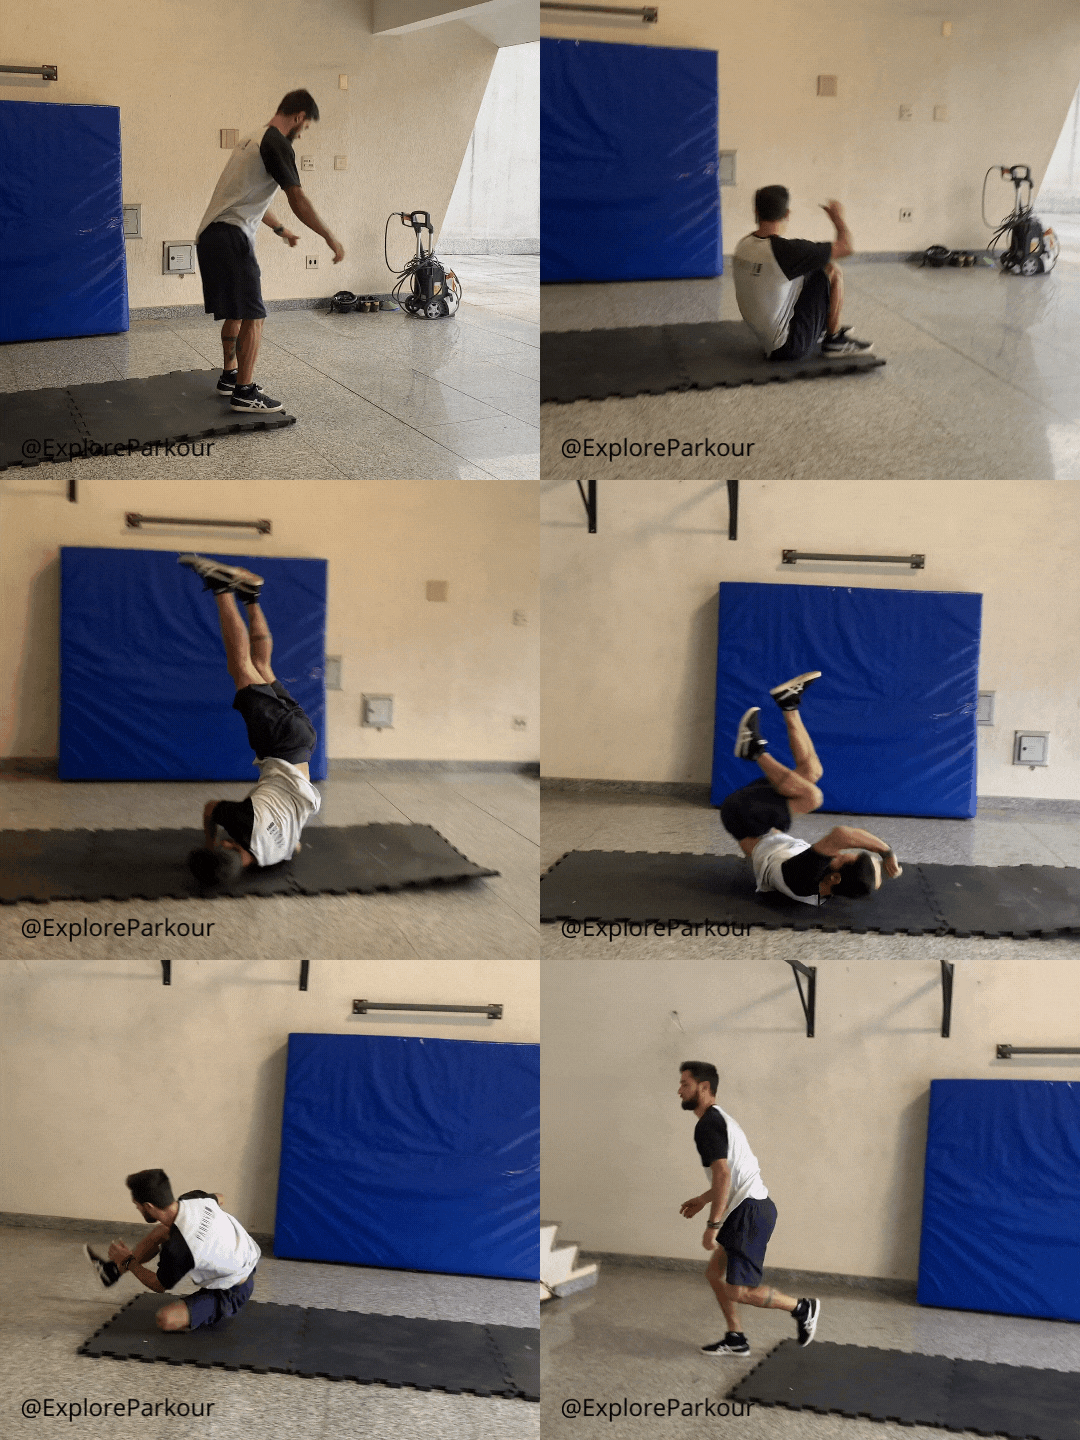
 The basic sequence of micro-transitions in this move is…
– Find yourself a flat surface to perform your Shoulder Roll. If you’re starting to work on this technique we suggest rubber, foam or grass. With practice you should be able to move to harder surfaces like concrete and have a more accurate technical feedback.
– Squat down in a lunge position with your front leg on the same side of the shoulder that you’re going to roll over. Place your hands right next to each other aligned with your back leg. You should be able to aim your shoulder towards the ground aligned in between your legs.
– Bend your elbows bringing the same side of your shoulder roll towards your body and place your forearm on the ground at the same time that you dodge it with your head by bringing your chin towards your opposite shoulder.
– Kick your back leg over your body as you smoothly roll over your arm all the way to the back of your shoulder. Keep your spine flexed and abs engaged so you don’t loose it’s rounded shape and roll your body all the way to the opposite side of your hips.
– Finish bending your back leg kick on the ground and rolling over the external side part of it’s thigh as you bring the other foot towards the ground and stand up. You can use your hands to push yourself up if you don’t have enough momentum.
Common Problems – Entry

There is probably a gap in between your forearm contact with the ground and the back of your shoulder. Maybe you’re trying to avoid the front part of your shoulder to hit the ground, but instead you’re hitting your scapula.
You can focus on performing your shoulder roll in slow motion and making contact with the ground all the way from your forearm – arm – shoulder. Bring your elbow towards your body so you can perform this transition as smooth as possible. The Seiza and Crouching Shoulder Roll Progressions can really help.

This is one of the most common ways to get injured with a shoulder roll. Usually it happens when you can’t smoothly roll all the way from your hands-forearms-arms-shoulder (when there’s too much momentum on your entry or a lack of timing on your micro-transitions) or when you don’t have enough rotation and start your shoulder roll with your hips and legs too far back and close to the ground.
A good and well rounded spine mobility (specially on your toraxic area) can help you to perform the shoulder roll smoother and to get yourself upside down just enough so this doesn’t happened. Make sure to work on hollowing your body and strengthening your core muscles. Spinal Mobilization, Hollow Rocks and The Tuck Up Exercise Page can help you with that.
Also try to get used to the timing and technique of your hands-forearms-arms support when you start the shoulder roll so you can eventually perform dive rolls and other technical variations where there will be more momentum for you to manage.
Common Problems – Middle

The first thing you should consider if you feel pain on your spine during the shoulder roll is that your path of travel might be too narrow, which means you’re starting this technique too close to your spine/neck and finishing too close to your tailbone as well. You can double check on a front shot clip of yourself performing a shoulder roll to see if this is happening.
One of the reasons is if you’re pointing out your elbow instead of bringing it towards your body when you start to roll. By doing so, your spine won’t be able to twist just enough to get in contact with the ground on a more lateral area of the back of your shoulder (infra muscles) and travel all the way towards the opposite side of your hips (on your glute/chick).
Starting your roll with feet together or simply not being aware of which leg should kick over your body and which leg should reach the ground last can also make your body fight against it’s path of travel. The Axe Kick and Shoulder Rock Up Progressions can help.

Make sure to keep your abs and core engaged so you can maintain a well rounded position until you finish the shoulder roll. You should feel an eccentric force pulling your legs/chest during the roll, but the key is to have the strength and body awareness to sustain the tuck position.
Your hip flexors are responsible to keep your legs as close as possible to your core while your abs are responsible to keep your spine hollow and flexed. Slow Motion Shoulder Rolls can help you to delevop this awareness and the Tuck Up Exercise Page can help you to strengthen your abs and hip flexors.

It’s quite common for those who are used to perform straight front rolls to bring their hips to the side in order to get the right path of travel on the shoulder roll. I always prefer to see practitioners performing a lateral roll instead of a front roll because of the spinal contact with the ground, but unfortunatelly this technical adjust won’t help with the shoulder roll.
The reason why our path of travel goes from the back of our shoulder towards the opposite side of our hips is the Axe Kick with the back leg. You don’t have to bring your hips to the side on the entry of the movement. In fact, by doing so, it will make it even harder for you to perform the Axe Kick. Wait until you’re upside down and half way through the roll so you can twist you hips just enough to sit on your glute/chick.
Explore a bit more your range of motion by performing a slow motion shoulder roll and reaching as much as possible with the Axe Kick while you still have the front foot or your front knee (Seiza Shoulder Roll) on the ground. If this is a problem to you, you can add some momentum by pushing the ground with your front foot and rotate a bit faster so your hips don’t fall to the side.
Keep in mind that Slow Motion Shoulder Roll drills will help you to develop your core muscles and awareness to stabilize your body while you’re half way through the technique.
Common Problems – End
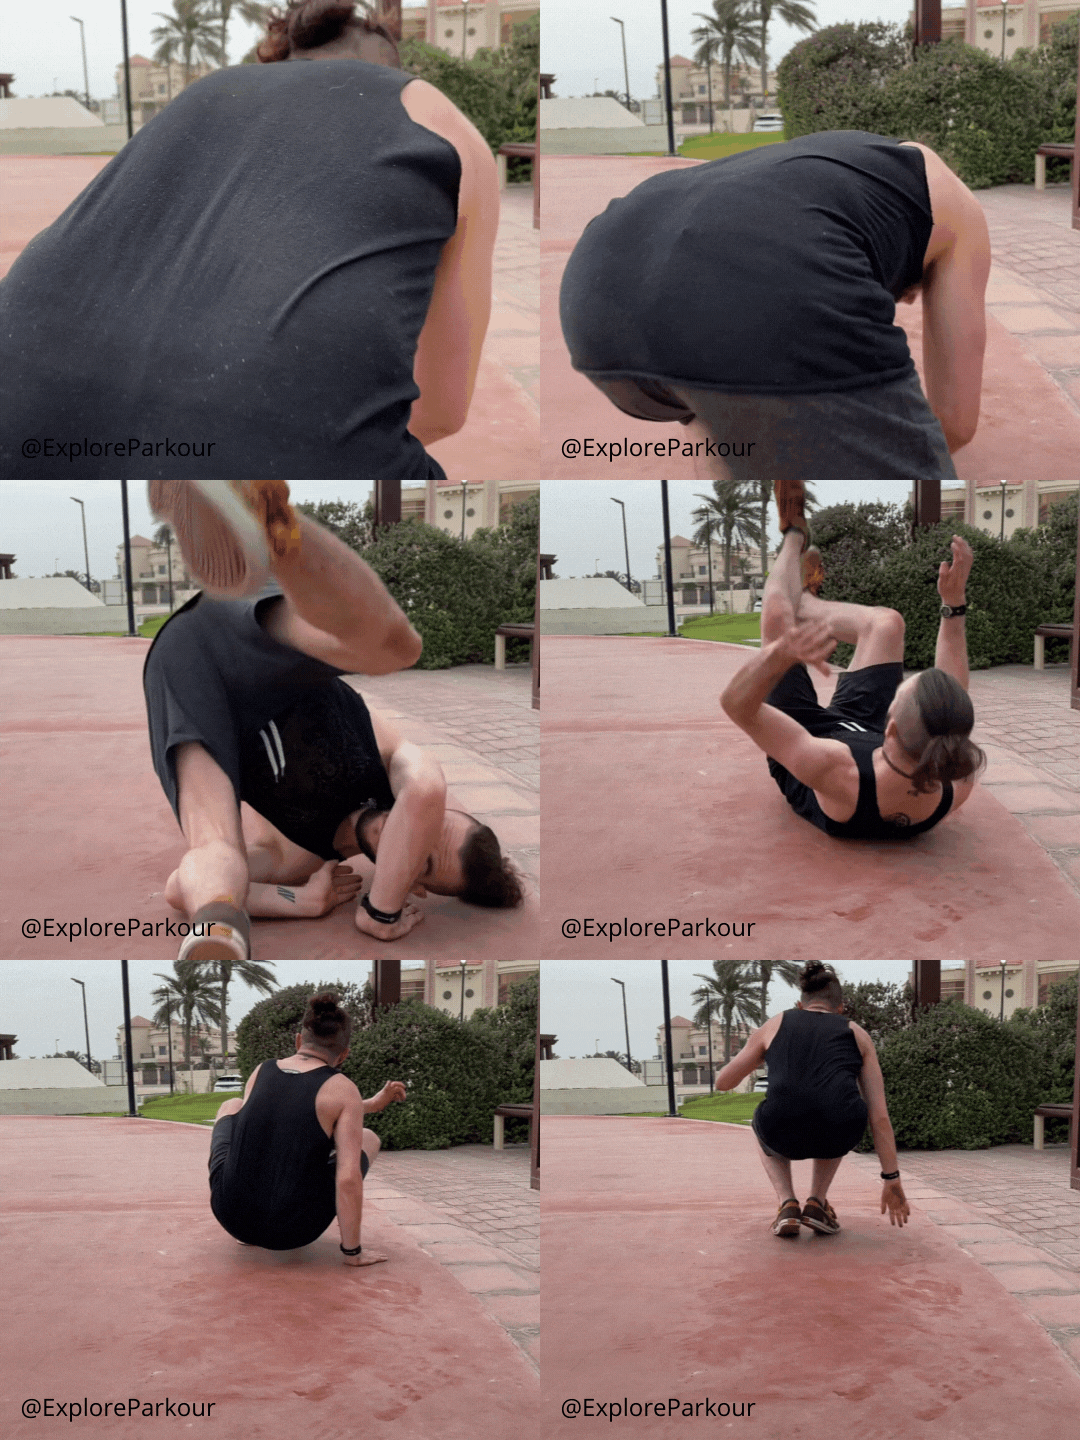
The tailbone is located right at the bottom of your spine and in between your glutes. If you’re finishing your shoulder roll with both sides of your chicks on the ground, it’s possible that you might be hitting it without even knowing because you’re only performing this technique on soft surfaces.
When your Axe Kick leg is about to reach the ground, it’s important to twist your hips towards the side that you’re about to roll over (the opposite side of your shoulder roll). You want to continue your roll from one side of your chick to the outside part of your thigh and start to stand up. Shoulder Rock Ups can help you to understand and practice the end part of your shoulder roll.
If you feel like your roll isn’t following a angled path of travel on your back, you should consider practicing this drill and improving your technique before attempting or applying it on hard ground surfaces. Wall Assist Progressions can help you with that.
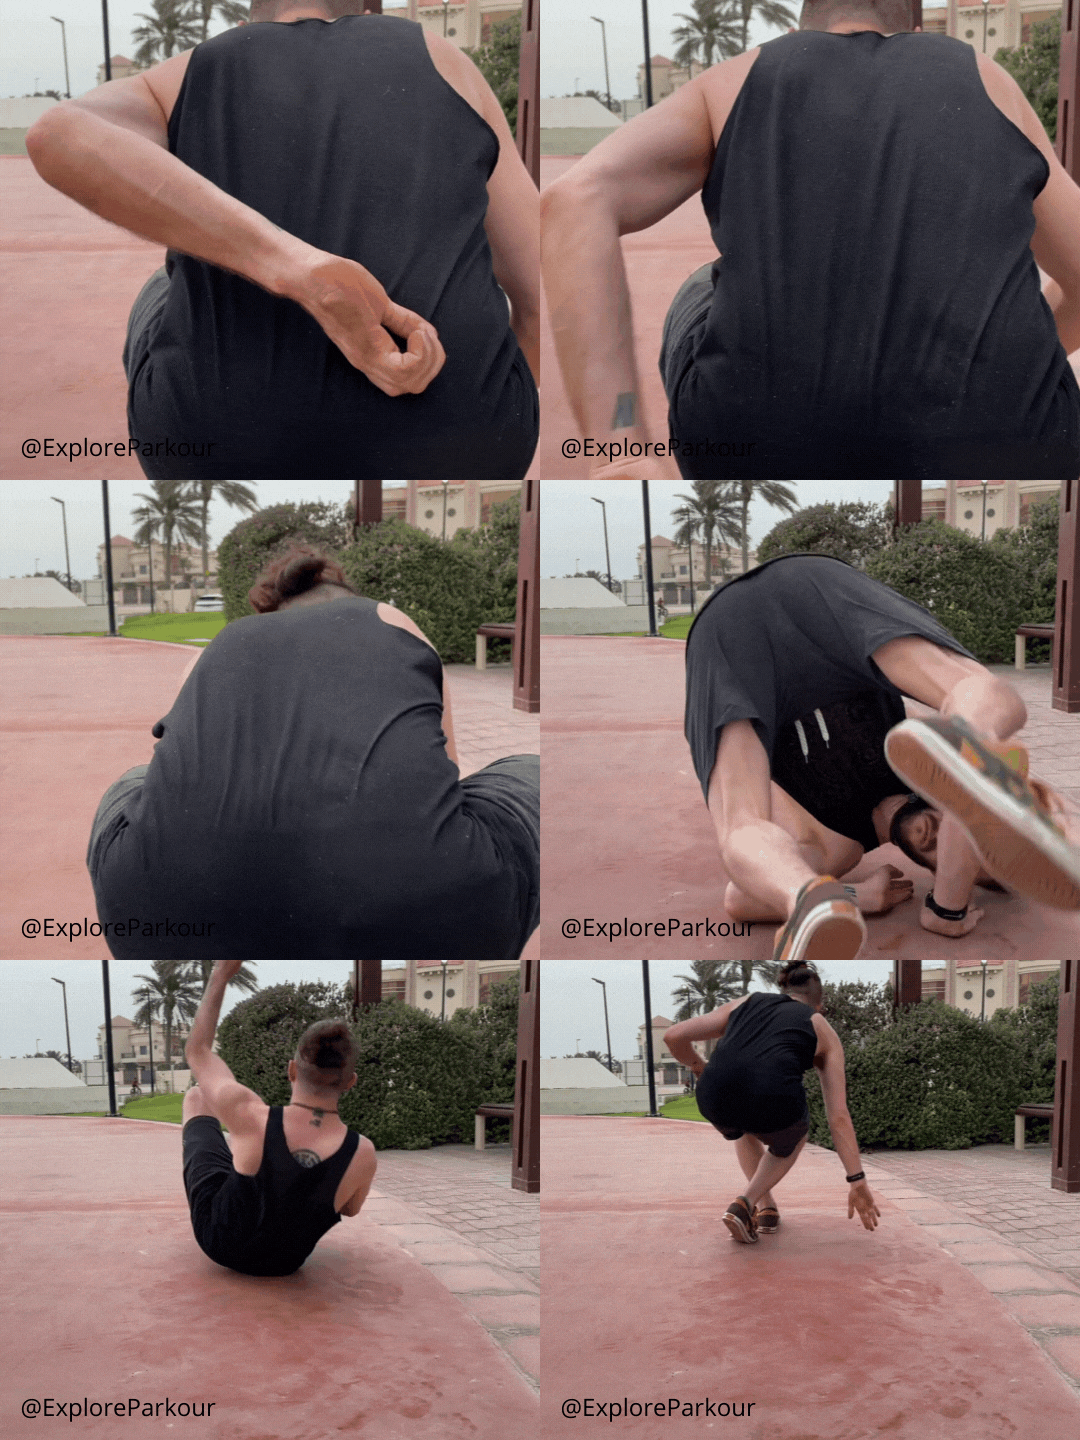
The PSIS is the section of the hip to which all the major ligaments of the hip attach. It’s located right above your chicks and you might be able to feel it with your hands. Some people have this area of their body a bit more exposed and with a sort of hole shape in their skin. It’s a terrible place to roll over.
Slow Motion, Wall Assisted and Shoulder Rock Up Rolls can help you to get your path of travel out of the way of your PSIS. Remember to twist your hips when you’re half way through the movement and to keep your spine flexed as much as possible by contracting your abs and hip flexors. Focus on landing on the outside part of your thigh (Axe Kick leg) and this might help with the hip twist motion.

This is a quite funny one and it can even turn into a cool modifier for a shoulder roll combo, but if you would like to fix this problem, it’s simpler than it looks.
Focus on practicing your Axe Kick entry so you can be aware of which leg should reach above your body first. Push the ground with the other leg (your front leg) and make sure to land with the Axe Kick leg first on the ground. You don’t want to step down with it, you want to continue the roll from your chick to the outside part of your thigh and step forward with your other leg foot in front while your chest and upper body raise up.
You can practice Axe Kick and Shoulder Rock Up drills to understand these micro-transitions better before performing the shoulder roll.

We see so many practitioners finishing their shoulder roll technique with legs binding. Even professional athletes. This is a common problem that might not hurt you but it can definitely decrease your momentum and mess up your transition from the shoulder roll into a next movement.
It comes from a lack of awareness and coordination to get the Axe Kick leg first on the ground. As we usually perform a shoulder roll at the end of a sequence or combo, this doesn’t bother too many people enough so they can take their time to improve their technique. But if you’re keen to perform Precision Shoulder Rolls and combine other techniques straight from it, this is something you should work on. Slow motion, Wall Assist and Shoulder Rock Up Progressions can help.
Progressions
- Seiza Shoulder PU
- Crouching Shoulder PU
- Spinal Mobilization
- Handstand Kick Up
- Half Roll Axe Kick
- Rolling Axe Kick
- Half Back Shoulder Roll
- Half Front Shoulder Roll
- Wall Assist Front Shoulder Roll
- Wall Assist Back Shoulder Roll
- Kneeling Shoulder Roll
- Slow-mo Back Shoulder Roll
- Shoulder Rock Up to Run
- Shoulder Roll - Soft Ground


Potential Modifiers
- Path of Travel - Back Shoulder Roll
- Path of Travel - Side Shoulder Roll
- Combination - Jump and Roll
- Combination - Backwards to Cat Hang
- Environmental - Dive Roll
- Environmental - Pop Shoulder Roll
- Environmental - Precision Shoulder Roll
- Environmental - Drop Shoulder Roll
- Environmental - Thred Dive Roll
- Rotation - Dive Roll 360
- Rotation - Palind Roll
- Rotation - Reverse Palind Roll
- Rotation - Swipe Roll
- Body Position - Arm Axis Shoulder Roll








Related Exercises
Laying Arch
Where should I feel this Exercise? On your Glutes, Lower, Mid and Upper Back mostly. What’s the Main Purpose? We usually float in between hyper extending and flexing our spine. This exercise allow you to strenghten the muscles needed to keep your torso straight or...
Tuck Up
Where should I feel this Exercise? Abs and hip flexors predominantly. Can also use the shoulders and pecs a bit for the arm movement. What’s the Main Purpose? Helps develop power for jumps, flips and other movements (like the cat pass) that require an explosive...
Push Up
Where should I feel this Exercise? Pecs, shoulders, triceps, scapulas, abs, and potentially glutes. What’s the Main Purpose? The push up is one of the first pushing exercises people will start with to build up their upper body pushing strength. For parkour this...
Related Techniques
Cat Leap
Also known as: Cat, Arm Jump, Cat JumpMovement Pieces The basic sequence of micro-transitions in this move is… - Like a Precision Jump, start with your toes at the edge of the obstacle. Squat - close to 1/3 - and bring your arms down and back as you lean forward -...
Dyno
Movement PiecesThe basic sequence of micro-transitions in this move is… - Start from a Cat Hang position on a wall high enough so your legs can be in a comfortable staggered position. The upper foot will be at least waist height and is used to support and push you...
Cat Pass
Also known as: Kong, Monkey Vault or Saut de Chat.Movement PiecesThe basic sequence of micro-transitions in this move is… - Choose a stable obstacle close to your hip height, with short width and enough space to place your hands on the top. - Give yourself enough...


